
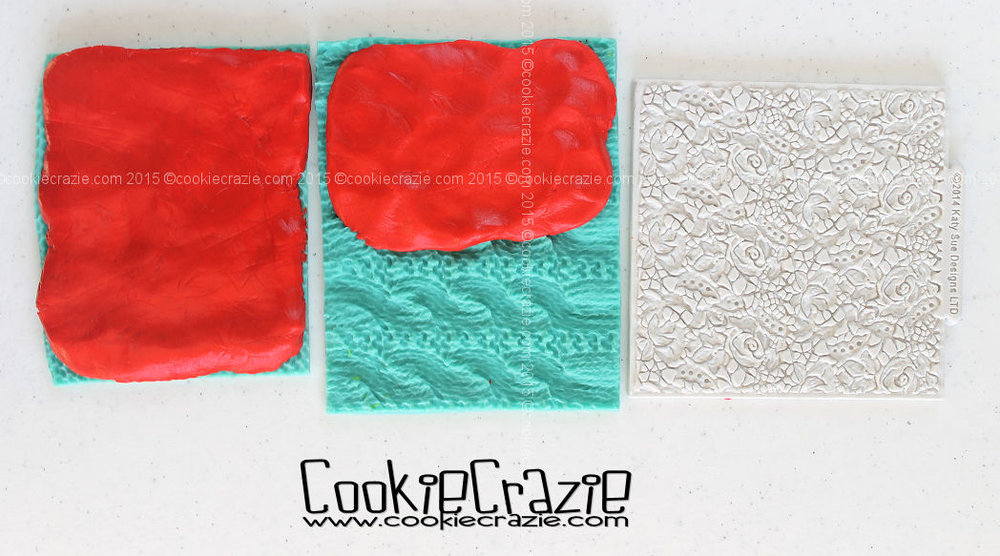
I was so excited when I started finding silicone molds for edible clay that resembled a knitted-look.
I had tried to pipe layers of glaze to create knitted look, but it was never quite right.
And then I discovered these molds:
They work perfectly with the
.
Here's a tutorial on how I use the molds to cover the cookies with textured clay.
It is very similar to using fondant.....but tastes a whole lot better. :)
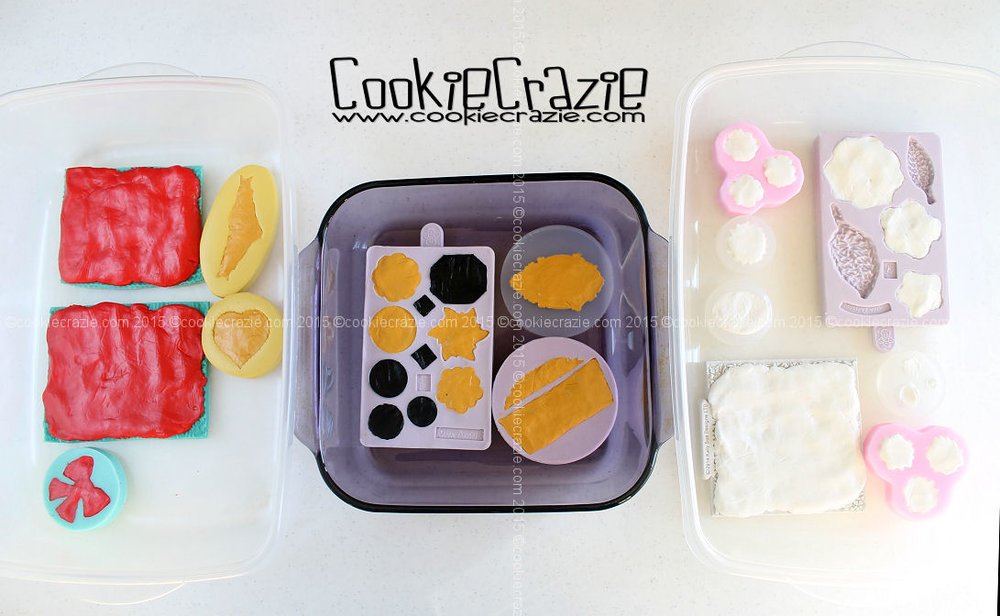
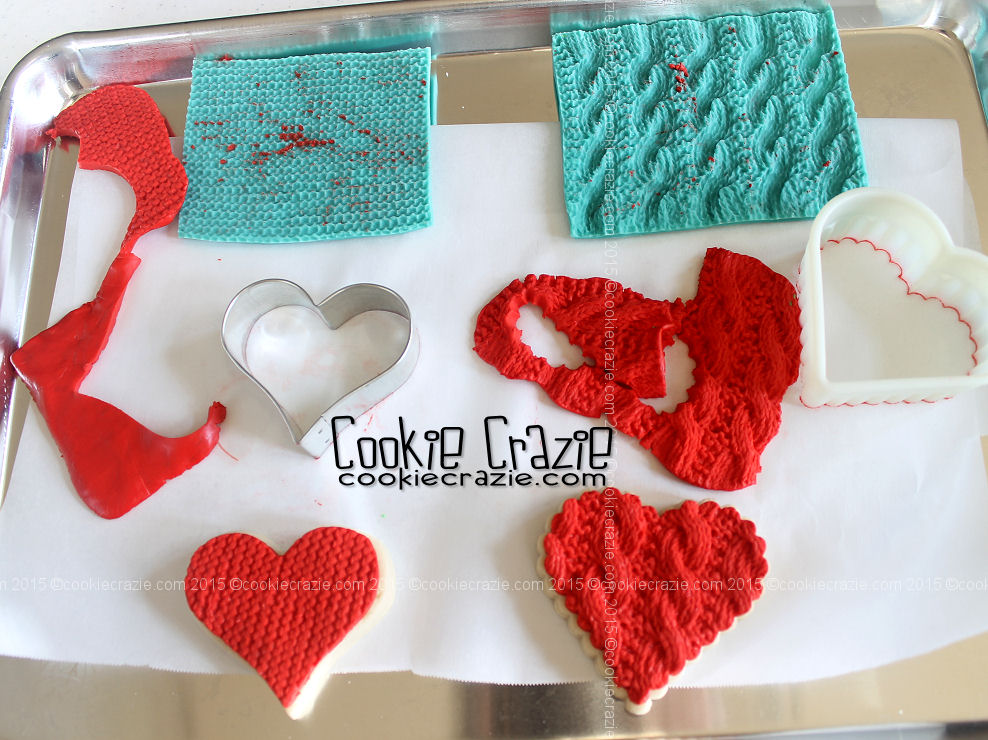
Firmly "load" the silicone molds with a layer of edible clay.
Be sure to press the clay firmly into all the nooks and crannies of the mold.
(P.S. I apologize that I can not figure out where I got the white Katy Sue vintage lace mold.)
Here's a photo of a bunch of silicone molds all ready to place in the freezer to firm them up.
Freeze the filled molds for at least 1 hour. Longer is better.
Once they are thoroughly frozen, carefully peel the clay off the mold.
Use the same cutter used to make the original cookie to cut out a perfectly fitted molded top.
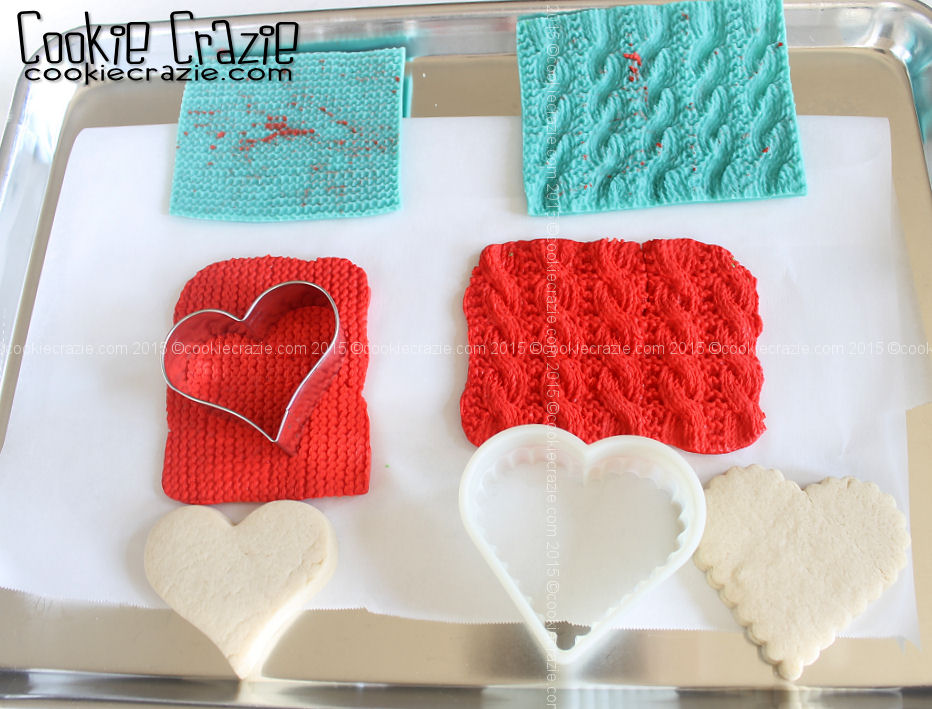
Place it on top of the cookie and apply minimal pressure.
As the clay comes to room temperature, it gets softer and will adhere to the cookie.
To prevent disfiguring the clay,
allow the cookies to dry for at least 24 hours before packaging or stacking.
2015
Valentines Day
Cookie
Collection
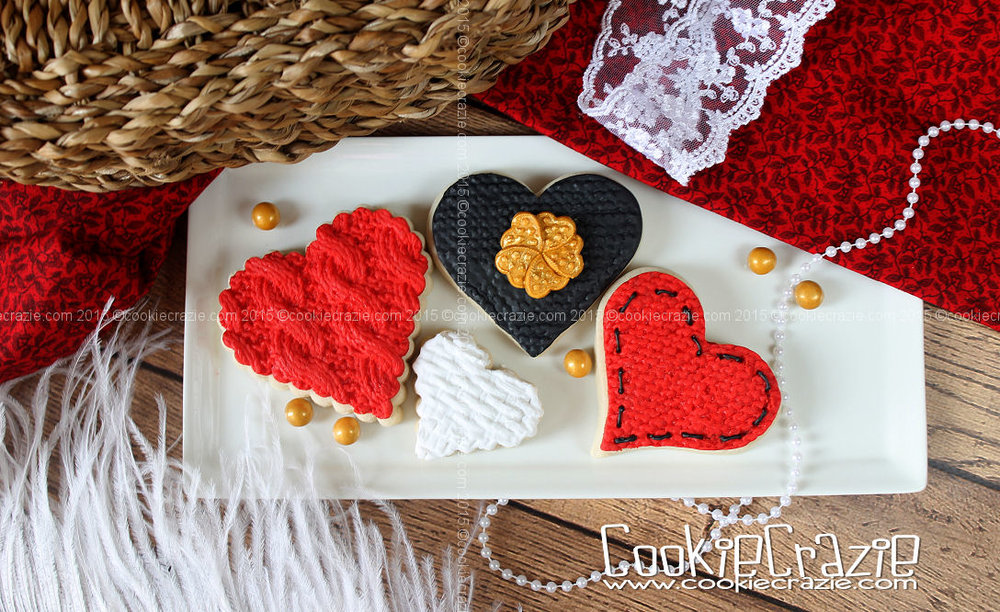
Textured Edible Clay-Covered Cookies (Tutorial)
Edible Clay Cut-Out Cookies (Tutorial)
Heart Cookies with Ribbon Bows
Red Gold Black Valentines Cookie Collection 2015
Woodland Tree Trunk Heart Cookie (Tutorial)
Textured Valentine Heart Cookie Collection